This week my bugs have been learning a bit about the different states of matter and their properties. We have been fortunate to experience some warmer temperatures these past few days (ie. above freezing) so the boys have been able to observe snow melting into puddles of water, the puddles freezing overnight into slick, glimmering ice, and then melting into puddles of water again later in the day. It was M’s inquiry of where all the ice came from that sparked the idea for us to investigate the different states of matter.
What is Matter?
I started by teaching M about matter. Matter is kind of a tricky topic to explain to a preschooler because it includes everything around us, including the air. Matter is anything that takes up space. In order to demonstrate this concept to M I grabbed a large bowl, along with some random items (figurines, toy cars, balls, paintbrushes, scissors, nuts, Lego, an empty pop can, a couple glasses of coloured water and a glass of ice).

Then I had the boys start filling the bowl with the items. When they were finished I asked them if these items took up any space in the bowl, and they replied ‘yes’. I explained to them that all of these items are matter. Matter is anything that takes up space. It is all around is, in everything that we can see, touch, and feel.


The 3 States of Matter
Solid:
I told M that anything that keeps its shape is called a solid. I had him demonstrate the properties of a solid by placing an ice cube into different containers. After placing the ice cube into each new container, I asked him if the ice cube changed its shape, and M replied ‘no’. Then I asked him if the ice cube took up any space in the containers, and he said ‘yes’. I explained that ice is water in its solid form. It does not change its shape unless we add energy to it.


Liquid:
I asked M what he thought might happen if we decided to add heat to the ice cube; he knew instantly that it would turn into water. I told him to hold the ice cube in his hand and to observe what happens. Immediately the ice began to drip through the cracks of his fingers. As he held onto the ice I explained to M that the heat from his hands are a form of energy, which is causing the ice to change its form from a solid to a liquid.
Next, I gave M a measuring cup of coloured water and had him pour the contents into each of the different containers. M observed that, unlike a solid, a liquid changes its shape to fit the container it is in. I also pointed out that he is able to pour a liquid, parts at a time, which he could not do with a solid.


I then had M think of some other liquids we might have in the house, and he came up with milk and juice. I brought out some milk and juice and had him pour them into the different containers to see if he was right. M observed that he could pour them and that they took the shape of each container that they were in, so they must also be liquids.


Next, I asked M what he thought would happen if we took energy away from the liquids. When we cool something down, we are taking away the heat/energy from it. What will happen if we make the liquids really cold? M told me they would turn to ice, so in order to test his hypothesis I put milk and juice into the freezer. Then we filled up some balloons with coloured water and placed them on the deck to see if the water would freeze after sitting out overnight.


When we checked on the milk and juice containers, M observed that they had turned into a solid. The balloons, however, were only partially frozen so I threw them into the freezer to be used for another activity. Click on the link to see what we did with the ice globes later on.
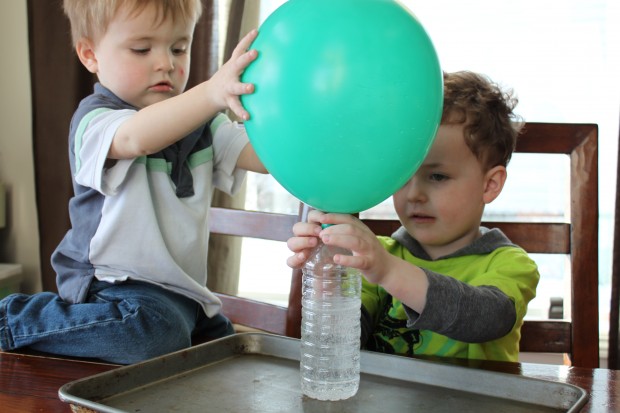
Gas
Explaining the properties of a gas is a little trickier than solids and liquids, so I started off demonstrated what a gas is by blowing up a balloon. I explained to M that inside of the balloon is a gas called carbon dioxide, and that all around us (even though we can’t see it) there is air taking up the space around us. To help prove this point, I had him flap his hands in front of his face really fast so he could feel the air moving against his skin.
Carbon Dioxide Balloon Experiment:
I explained to M that there are many different types of gas: the air we breath in, the carbon dioxide we breath out, helium which is lighter than air and causes balloons to float, the gas we fill our cars with (turns from a liquid to a vapour), etc.
Gases have no fixed shape, and they fill up any container they are in.
I wanted to show M that sometimes we can create a gas when we combine substances together that create a chemical reaction. We’ve conducted experiments with baking soda and vinegar in the past, but we were always more interested in just watching the flowing gas bubbles than actually capturing the gas (carbon dioxide).
Watch the video to see what we did!
The boys loved this experiment, so naturally we did it a few more times!


Water Vapour
I demonstrated water vapour by taking some water and boiling it in a kettle. I set out the different states of water for M to observe: in one bowl I put ice, in the next bowl I put water, and lastly was the boiling kettle which was producing water in its gas form. I explained to M that adding energy/heat causes the water to change its state; water can change from a solid, to a liquid to a gas. And by taking energy/heat away, it can change from a gas back into a liquid, or from a liquid back into a solid. I demonstrated to M that by placing a piece of paper in front above the spout of the kettle, it cools down the water vapour to form droplets of water, turning it from a gas back into a liquid.
The states of water from a liquid to a gas and back to a liquid again is explained quite well in this clip taken from The Magic School Bus:
http://www.youtube.com/watch?v=oaCUyZw4Tjo
The Molecular Properties of a Solid, Liquid, and a Gas
This is obviously a very abstract concept for a preschooler, being that we are talking about molecules which can’t be seen with the naked eye, but it ended up not being as difficult for M to grasp as I originally thought. I started by explaining that all matter is made up of really tiny particles called molecules, which we are only able to see under a powerful microscope. The molecules behave differently depending on whether something is a solid, a liquid or a gas. If we look at ice, which is a solid, it does not change its shape. The molecules in a solid are packed really close together and they don’t have room to move around, so the ice keeps it shape. The molecules of a solid don’t have a lot of energy. Water, on the other hand, is a liquid, and the molecules in it have a bit more room to move around; they can slide past each other, which allow liquids the ability to flow. A liquid changes its shape to fit the container it is in because its molecules are not packed together and fixed in place like a solid. The molecules of a liquid have more energy than the molecules of a solid. The molecules of a gas can move around freely, and contain more energy than a liquid or a solid.
M and B watched this short video on the molecular properties of a solid, liquid and a gas to help explain it a bit further.
Also, if you love Bill Nye as much as I do, here is a video of the different phases of matter from his show, Bill Nye the Science Guy. The boys and I watched the first few minutes of it to help explain the difference between a solid, liquid and a gas.
http://www.youtube.com/watch?v=Gxwj24mREyA
Solid, Liquid, Gas Game
When the boys were finished watching the video, I used M as an example to help him identify with the molecular properties of a solid, liquid and a gas. I told him that when he is tired he is like a solid because he just wants to sit still, but when he gets some food or energy in him he starts to move around a little bit, like a liquid, and when he gets a lot of energy he just wants to run around, like a gas.
I thought it might be fun for the boys to act out the molecular properties of a solid, liquid and a gas, to get them moving and thinking about what they have learned:
Depicting Molecules in Each State
Next, I gave the boys three paper plates, and labeled them as solid, liquid and gas. I told M to use the paint dabbers to show what the molecules look like in each state (I expected little B to just do his own thing, but he was right in there with us!).


I was really impressed with all of the information M was able to absorb, analyze, and demonstrate, especially since some of it is quite abstract. Even little B had a great time participating in the activities and experiments. I may have two little scientists in the making!
Click on the link to view more of our science experiments and activities.
Thanks for stopping by!
Hi, Nicole. Wonderfully done, as usual! This is so timely for me, as on Thursday I had Max for the day and we were talking about water becoming ice and vice-versa. I was wondering how to take it farther to teach him more. Thank you for the GREAT ideas and hands-on approach!
Thanks Stacy!