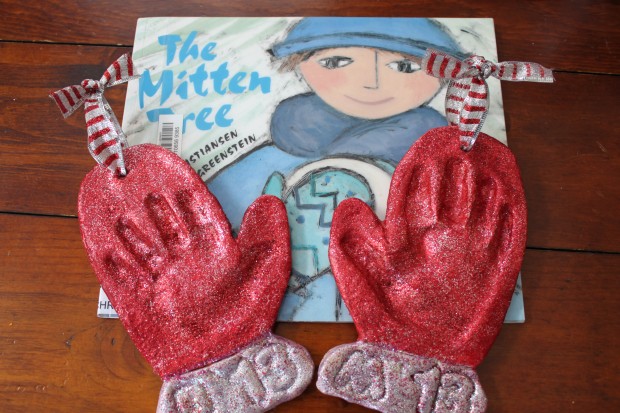
I wanted the boys to make some handprint mitten ornaments to give as personalized gifts to their grandparents. The Mitten Tree, by Candace Christiansen, and The Mitten, by Jan Brett were the perfect books to accompany our project!
The Mitten Tree
The Mitten Tree is a heartwarming story about the joy of giving, and taking the time to notice and care for others. When an elderly lady, Sarah, notices a little boy waiting at the bus stop with no mittens, she knits him a pair and hangs them on a nearby tree branch for him to find. Each day Sarah watches for children without mittens, and hurries home to knit more to hang in the tree. Before Christmas vacation, she uses up all of her yarn in order to knit enough mittens to hang on every branch of the tree. Even though the children had no idea who was responsible for the beautiful mittens, their smiling faces were enough to fill Sarah’s heart with joy and warmth. At the end of the story, Sarah receives a surprise gift of her own.
Handprint Mitten Ornaments
After reading The Mitten Tree to the boys, we got to work making some handprint mitten ornaments.
Materials
- 1 cup salt
- 2 cups all purpose flour
- 1 cup water
- mixing bowl
- parchment paper
- rolling pin
- mitten template (I used a large mitten from Homeschool Creations’ The Mitten Printable Pack
- scissors
- oven
- dull knife
- acrylic paint (I used Martha Stewart’s acrylic glitter paints in garnet and pearl)
- extra loose glitter (optional)
- straw
- letter and number play dough stamps (optional)
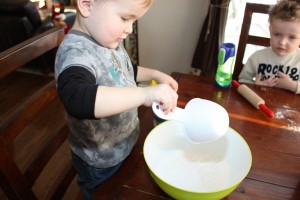
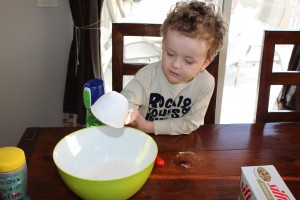
First the boys measured and mixed the salt, flour, and water in a mixing bowl. You may need a tad bit more water if your dough is too dry.
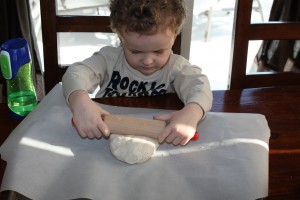
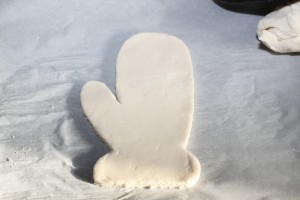
After kneading the dough, I gave each of my bugs half of the dough to flatten and roll out with a rolling pin.
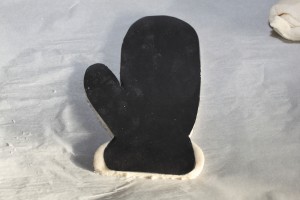
I traced the mitten, which I found in The Mitten Printable Pack from Homeschool Creations, onto a piece of cardstock, and laid it over top of the rolled-out dough. Then I cut around the template with a dull knife.
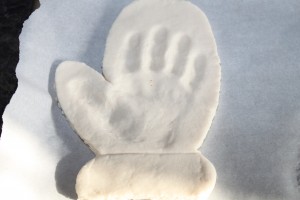
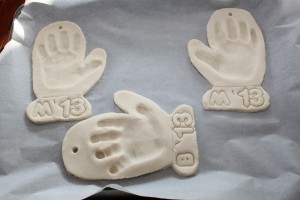
The boys pressed their hands into the dough mitten, creating a good impression. I made sure to use opposite hands for each of my boys so together their prints would make a mitten pair.
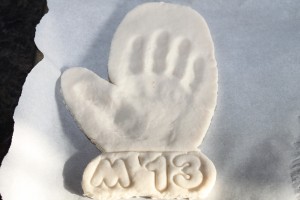
I drew a line across the bottom of the mitten with the knife, to create a cuff. Then, using our play dough stamps, I stamped my bugs’ first initial and the year onto the cuff of the mitten prints.
I placed the mitten ornaments onto a baking sheet covered with parchment paper, poked a hole through the top of each one with a straw for hanging, and then popped them into a 250° preheated oven for about four hours.
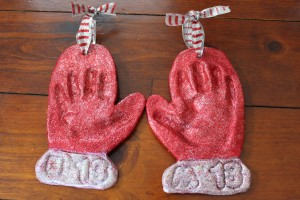
We didn’t get around to painting our mittens until a few days later. We used two coats of Martha Stewart Glitter Acrylic Paints in garnet and pearl (I wanted them to resemble Santa’s mitts). We also added some extra, loose glitter to the wet paint to make them even more sparkly. Lastly, I looped a matching ribbon through the holes. I plan on wrapping the pair of mittens in tissue paper as a gift for the grandparents from the boys (one print belongs to M and the other to B).
The Mitten
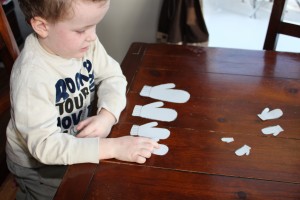
While the handprint mittens baked, I read Jan Brett’s The Mitten, online at We Give Books, to my boys. Then, using The Mitten Printable Pack from Homeschool Creations, I read the online book to the boys again, while they took turns adding the animals inside of the paper mitten as they were introduced.
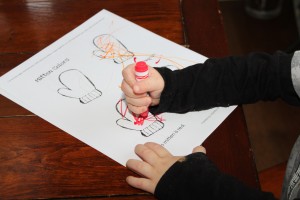
We did a few of the other activities from the package as well:
This package is full of awesome learning activities, and it’s completely FREE! I plan on having M and B complete more of the activities in the following days.
Finger Knitting
My bugs are still too young (and uncoordinated) to do this, but if you have older kids, you should give finger knitting a try! It would tie in perfectly with either of the books!
Click the links for more winter picture book ideas and fun winter activities.
Thanks for stopping by!




I love how your mitten ornaments turned out! I’m wondering how you painted them: did you use the Pearl color first or garnet? Also, what color of glitter did you use? Thanks in advance!
Thank you Sarah! Sorry it took so long for me to get back to you. We just welcomed a new addition to our family, so I haven’t had much time for blogging ;). We used the garnet colour for the top part of our mittens, and pearl for the bottom (trim) part of our mittens. We sprinkled red glitter on top of the red/garnet paint, and dusted some silver glitter on top of the pearl paint, while the paint was still wet. Hope this helps!
These are so adorable and I am wanting to do this with my two kids for all the grandparents and great grandparents this year. How many did you cook in the oven for the 4 hour time period?? Do you think it matters how many sets you cook within that 4 hours?
Hi Brittany! We baked 4 (2 sets) at the same time. I don’t think it matters how many sets you bake together, although the amount of time would also depend on your oven. Happy holidays!
I want to do these with an entire class. Did the recipe above make just the 4 mittens?
Yes, it made 4 mittens using the mitten template I printed off from http://www.homeschoolcreations.net/2012/01/printables-for-mitten-by-jan-brett/ . You may end up with a bit of dough left over, which the kids can use to make smaller ornaments using cookie cutters.
I just made a new handprint mitten ornament for our baby girl. They are simple to make, and I love how they add a bit more sparkle, as well as a lot of nostalgia to the tree. I just used regular acrylic paints (red and white) this time, along with red and silver glitter from the Dollar Store.
Have fun with your class, and merry Christmas!
These handprint mittens are so cute. The directions say about 4 hours, how do I tell if they are done enough? I have never done this before. Thanks for your help.
Thanks Mechelle! The dough will change from a yellowy tinged colour to more white. If you touch them and they seem to be hard, they are fine to paint. I let mine sit on the counter for a couple more hours after taking them out of the oven before painting them, just to make sure they had cooled completely and to give them a bit more drying time. The backs of my ornaments still had a bit of a yellowy tinge to them, but they were hard to the touch, so I just painted them. Depending on how thick your mitten ornaments are, will depend on the drying time :). You should be able to take your fingernail and scratch them, without making an impression.
I hope this helps! Merry Christmas!
I love these!! So glad you shared. I was wondering if I could write on the bottom part of the mitten (the part that is white on yours and where you have the stamps) with a sharpie? Would it stay? Thank you!!
I think the Sharpies would work fine, Malori! Thanks for stopping by!
Hi, We made these mittens last night and with the recipe made 8 thin ones. I have now baked them for about 8 hours and they are all still soft on the bottom!
Did you bake them 250C or 250F?
Hi Courtney!
It’s okay if they are still a bit soft on the bottom. If you can scratch the surface with your fingernail, and it doesn’t scrape away any dough, you can paint them. I bake them on a low setting (250F) for a long time just to make sure they don’t burn. After baking ours, I flipped them over and left them overnight for us to paint the next day. They were still yellowish on the back side, and a bit soft, but I did the scratch test and decided they were fine to paint. They’ve lasted us for 2 years so far and they still look great!
Hello!
Would tempera paint work, or does it have to be acrylic? I’d love to make these with my class tomorrow and there are only 2 school days left! If they print tomorrow and I bake tomorrow night, they can paint on Wednesday but how long does the paint take to dry? Thanks so much in advance!
Hi Jaclyn!
I recommend using acrylic paints over tempera paint. The tempera paint will easily absorb into the salt dough, and the ornaments will require a lot more coats of paint (which may not be the best option if you want them to dry in time). Acrylic paints also tend to dry nicer than tempera paint.
These ornaments take quite a long time to dry. If you place them in the oven for 4 hrs at 250F, and then let them dry over night (make sure to flip them over when air drying over night), they may still appear to be soft on one side, but that’s okay! If you can scratch the surface of the salt dough, and it doesn’t peel, you can still paint them with no problems.
If you were to make the ornaments in the morning, bake them, have them dry more over night, and then paint them the next morning, the paint will be dry by the end of the day.
Don’t forget to make a hole in the top of each one, before baking, so you can tie a ribbon through them! A straw works well for that. 🙂
Good luck!
Thanks so much!! I’ll keep you posted 🙂
Love this idea! I’m going to do it as Christmas gifts this year! Thanks for sharing